You mostly take screenshots on your iPhone for various purposes, such as payment transactions, business work, school tasks, social media use, or other types of work and proof. You can save these screenshots to your Photos, Files, or Quick Note section.
Sometimes, you may need to share them with others. The screenshots you take on your iPhone should be of high quality so that they look clear and sharp whenever you use them. When you share photos or screenshots via WhatsApp or other file-sharing apps, they sometimes reduce the image quality. That’s why you should always capture your screenshots in HD quality.
How Can You take HDR Screenshots on iPhone 17?
But now the question is: how can you take HDR-quality screenshots on your iPhone? Your iPhone’s default setting captures screenshots in standard quality, but Apple provides an option to enable higher-quality screenshots. You just need to follow the steps below to change your SDR screenshot setting to HDR-like quality.
How to Change SDR to HDR Screen capture on iPhone 17
iPhone provides an option to change the quality of screen-captured images.
- Open the Settings app and tap on General.
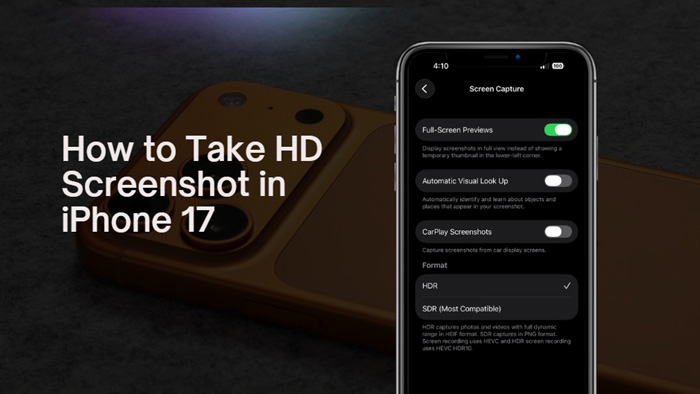
- Then, scroll down and click on the Screen Capture option.
- You will see the HDR and SDR (most compatible) options.
- Tap on HDR, and the pick sign will show on it, which means your screenshot will be captured in HDR format.
HDR captures photos and videos with full dynamic range in HEIF format. SDR setting captures in PNG format. To take an HD screenshot on iPhone 17, press the Side Button + Volume Up Button simultaneously for a quick capture. You can compare both formats of screenshots. The HDR screenshots file size may be larger than the SDR format.
You can also record the screen in HDR format with the same settings. So now capture and record the screen on your iPhone 17 in high-quality format.