As an entertainer, you’re always looking for new and innovative ways to wow your audience. One way to do that is by using LED pixel tape on stage. This type of tape features small, individually controlled LEDs that can create a variety of patterns and effects.
Not only does LED pixel tape look great, but it’s also very versatile. You can use it to create backdrops, borders, and even props. Plus, because the LEDs are so small, they’re perfect for creating text or logos.
If you’re looking to add a bit of flair to your next performance, consider using LED pixel tape. It’s a great way to make your show stand out from the rest.
In this article, we’ll explore how to use LED pixel tape on stage and some of the benefits of doing so.
What is LED pixel tape?
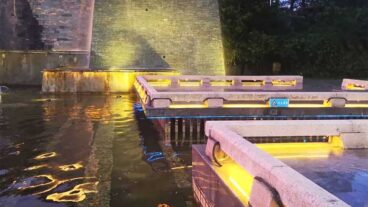
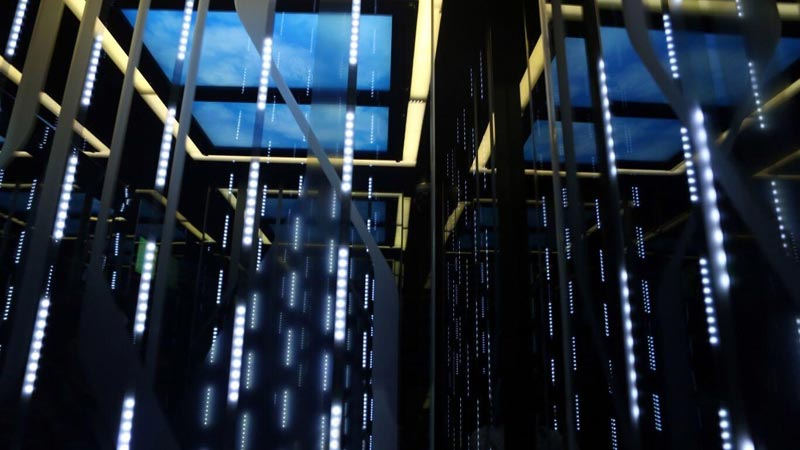
LED pixel tape is a type of LED lighting that is used to create patterns and effects. It consists of small, individually controlled LEDs that can be arranged in a variety of ways. This makes it a great choice for creating eye-catching displays on stage.
LED tape analog to pixel tape or intelligent tape, smart tape, or pixel tape; a common lighting option. Loomed from the flexible circuit board base is a front-facing board to which LEDs are connected. Behind the LED tape, adhesive backing is often found.
RGB tape has been taken to great levels by making use of addressable surface-mounted LEDs within LED pixel tape. Because the LEDs can be individually addressed, every LED can be controlled separately.
To maintain your LED pixel tape light for a long period of time, you can read a full article about “common problems with LED lighting“.
Why Use LED Pixel Tape on Stage?
There are several reasons why you might want to use LED pixel tape on stage. Some of the benefits include:
>>>Versatility: LED pixel tape can create a wide range of patterns and effects, allowing you to create a truly unique show.
>>>Durability: LED pixel tape is built to last, meaning you can use it time and time again without having to worry about it breaking down.
>>>Low Maintenance: Once you have the LED pixel tape set up, there’s very little maintenance required. You can just let it run and enjoy the show!
>>>Ease of Use: LED pixel tape is very easy to use, making it a great choice for those who are new to stage lighting.
If you’re looking for a way to add some excitement to your next performance, consider using LED pixel tape. It’s a great way to make your show stand out from the rest.
How to Apply LED Pixel Tape on Stage
Now that you know a little bit about LED pixel tape and the benefits of using it on stage, let’s take a look at how to use it. Here are a few tips:
1. Gathering Your Supplies
Before you can start using LED pixel tape on stage, you’ll need to gather a few supplies. You’ll need the LED pixel tape itself, as well as some basic tools like scissors and a screwdriver. You may also want to get a power supply and some controllers to help manage your LED pixel tape.
Alongside using the tape itself, you will most likely need a lighting console, a DMX chip, and a pixel driver. By doing this, it is possible to entirely control the lights, making it easier to get the results you want.
2. Preparing the Tape
Once you have all of your supplies, you’ll need to prepare the LED pixel tape. This involves cutting it to the correct size and connecting it to the power supply and controllers.
Before you determine what place you want to install your LED pixel tape, you have to consider how you will mount it. Even if an adhesive can stick to many surfaces, you still have options, as well as if you prefer better quality tape, it tends to stay attached for quite some time.
You might want to avoid placing the LED pixel tape directly on walls or painted surfaces, as it is a risk to damage the functioning of the product upon removal.
At times, the use of metal channels can be an effective approach. Aluminum channels are lightweight and heat-dissipating, and aluminum is easy to cut to length.
3. Installing the Tape
Once you have prepared your LED pixel tape, it’s time to install it. This involves attaching it to the stage in the desired location. Make sure to use plenty of electrical tape to keep everything in place and avoid any short circuits.
4. Controlling the Tape
Now that your LED pixel tape is installed, it’s time to start controlling it. This involves using a lighting console to create the desired patterns and effects. By using a lighting console, you can easily change the look of your show on the fly.
LED pixel tape is a great way to add some extra pizzazz to your stage show. With its wide range of patterns and effects, you can create a truly unique show that will wow your audience. LED pixel tape is also built to last, meaning you can use it time and time again without having to worry about it breaking down. Plus, once you have the LED pixel tape set up, there’s very little maintenance required.
So why not give it a try?